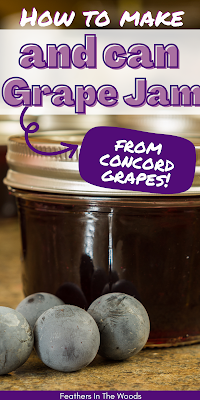
One of my favorite things to make instead of buy is grape jam! I grow concord grapes and there is just no comparing the flavor from homemade jam to store bought. It's one of the simpler canning recipes out there, though it can be a bit tedious at first.
Grape jam is probably the only preserve I make every single year! It's also one of the simplest preserves to make. All you really need is grapes, sugar, water and lemon juice.
First you separate the grapes and cook them apart, then strain, blend and combine and cook again. That's it!
It's also really easy to water bath can grape jam, so if you're new to canning...it's a great way to get started without investing a ton of money.How to make and can grape jam
I've used the same recipe for at least 15 years! In the beginning I had to adapt it for my kitchen which was not stocked with a bunch of specialty tools like food mills.
So again, this is the perfect recipe if you're just getting started because all you're really going to need is some pots and regular kitchen tools, the ingredients and some ball jars.
Grape jam recipe
2 pounds Concord grapes1/2 cup water
4 cups sugar
1/4 cup lemon juice (I use the organic bottled juice as squeezing lemons for juice makes the jam a bit too tart)
The first part is the most tedious, but the second part is the most chaotic so buckle up...
You're going to need two non-reactive pots. Squeeze each grape to remove the skins from the flesh. Put all the flesh in one pot and all the skins in another pot. It takes a while but it's easy work.
Add the 1/2 cup water to the pot of grape skins and bring to a boil. Reduce heat and simmer for about 20 minutes. Turn the heat off and let it set for about 5 minutes. I like to use an immersion blender (if you have one) to smash up the grape skins so they're a bit smaller
You don't have to though if you don't want to.
At the same time you're putting the grape skins on the stove, put the pot of grape flesh on the stove and bring it to a simmer. It's going to take about 5 to 10 minutes but you want them to completely fall apart.
You're going to be able to see the seeds loose of the flesh and the flesh just kind of turned to mush. That's what you want.
Once the flesh has pretty much fallen apart you're going to turn the heat off and let it cool for maybe 5 minutes. You can run it through a food mill if you have one, but I just use a metal strainer
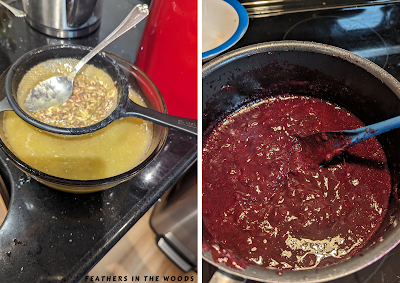
Prop it up on top of a glass or ceramic bowl and add the grape flesh mixture one cup at a time and just let it drain through.
You might have to mix it a little toward the end with a spoon but once it all drains you'll just be left with a pile of seeds and a little bit of greenish grape guts.
Add the now de-seated grape flesh to the pan that has the grape skins in it. Stir in your sugar until it dissolves, then add in the lemon juice and stir again. Bring this mixture to a boil and simmer for about 10 minutes. Once it reaches the gel stage you are done.
Remove the mixture from the heat and allow it to sit about 5 minutes. Occasionally stir gently. Skim off the foam before putting in jars.You can allow the grape jam to cool and store it in your refrigerator for about 3 weeks or you can can it for long-term storage. This makes a few jars so unless you eat a lot of grape jam, you'll want to can it for later use.
I like to use the water bath method to can.
If you made my apple butter recipe you will recognize the same steps!
How to can grape jam
Ladle your jam into clean, hot, half pint canning jars, leaving a quarter inch of space at the top. This is called headspace.
Release air pockets either by tapping the jars or using a plastic butter knife or wooden chopstick. Make sure the rims are clean, then center the lids on the jars and screw on jar bands.
To make sure the lids are not too tight (which prevents gasses from getting out during the process) and not too lose (which allows water in the jar) I put the jars on a towel to fill them. Tighten lids with only the fingertips of one hand.
Once the jar starts to spin on the towel, they're tight enough!
Process for 10 minutes in your water bath. Turn off heat and let set for 5 minutes. Remove jars from water bath, and allow to set for 24 hours. Before storing, remove jar bands and check that all the seals have popped in.If your jars have not sealed, it's okay. Your grape jam is still fine It just needs used within a few weeks. Store any that haven't popped in the refrigerator.
If this is your first time canning and you have questions check out The beginners guide to water bath canning from A modern Homestead. My friend Victoria breaks down canning in a way I never could! She can definitely help you out.
Tips for Grape jam Success:
Grape jam is typically made with concord grapes but you can certainly use other grapes! Concord just have a stronger flavor that works better when cooking them. I had jam made with champagne grapes once and it was out of this world
So don't be afraid to experiment with different types of grapes.
If you don't like your grape jam too sweet, you can cut the sugar a little bit. Start with two cups wait till it's mixed in completely then get a clean spoon and taste your jam and see if you want to add another cup.I usually don't use the full four cups, but I like my grape jam a little less sweet than most people. You can tweak the sugar but never change the lemon juice amount because that is what helps preserve the jam and keep you from getting botulism!
You should be able to find everything you need for canning at the local grocery or big box store. I have the ball canning accessory set. It has a magnetic lid lifter, canning funnel and a jar lifter to grip and lift the jars in and out of the boiling water.
These are pretty much the only tools you will need besides canning jars with lids.
Canning can be a bit intimidating at first, but the more you do it, the easier it gets. Just be careful to follow recipes exactly (for food safety) and you'll be fine!
Related reading: Not sure you have time to preserve your garden harvest before it goes bad? Check out How to keep produce fresh longer!
~L
Want gardening and healthy living information sent right to your email weekly? Click right here to join my list and get new posts sent directly to you the day they're published!
(This post contains affiliate links. If you chose to purchase something through the link, I will get a small payment from Amazon. It will not affect your purchase price)


No comments:
Post a Comment