Showing posts with label re-use. Show all posts

How to design a flower planter you'll love!

We all know I love to garden but I noticed something about my gardening style a few years ago. I only plant flowers in planters! Weird, right? Unless it's an herb, all my flowering plants go in containers. I do have a few rock gardens specifically for flowers but there are absolutely no ornamental flowers in my regular garden. 

planting flowers in containers

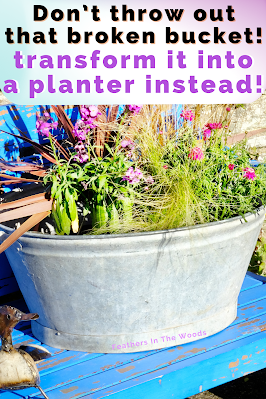
I'm also not picky about what kind of planters I use. I will plant flowers in any container that can hold dirt! I've used everything from a broken bucket to a kitty litter box for planters. 

When choosing plants you want to consider their eventual size not the size at planting. Leave room for them to grow into their new habitat or they become root bound and their growth will be stunted. Unfortunately that means the first few weeks after you plant your container can look rather sparse. When it fills in though, you'll be glad you left space!

Planting flowers in containers is really easy you'll just want to keep a few points in mind. 

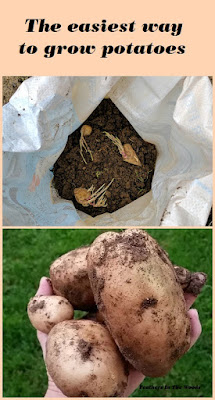
The easiest way to grow potatoes

I grow potatoes every year and have honestly never started them this early before! However, I have a bag of potatoes that have sprouted so severely that I decided they are just asking to be planted. So, I'm planting them now...even though it's only April. 

how to grow potatoes

I'm also planting these potatoes in feed bags because that is the easiest way to plant potatoes that I have ever tried! I love this method for several reasons mostly because I don't have to dig to harvest the potatoes. Also, there's practically no weeding. Plus:

You can plant potatoes anywhere!

That's right! When you're using bags to plant potatoes you can put the bags on your porch, patio, next to the garage or anywhere else even if you don't have a garden space. 

Plus its another way to reuse all those feed bags I have accumulated. You can buy reusable grow bags if you don't already have bags you can use. Or ask a friend with livestock to save you a few bags...we go through a ton!

However, I have never planted grocery store potatoes before so this project may require just a bit of luck...

First of all I should mention that I store my potatoes in an old fashioned Potato and Onion bin. If you don't have one of these you need to read here why I love mine and why you need one! 

Yes, the potatoes did sprout and the onions sometimes do too, but nothing ever rots in that thing! This is one of those old fashioned items that I just don't understand why people quit using.

Making campfire starters

About 2 years back I posted a tutorial on how to Make your own Fire Starters. The fire starters I made in that post were the small size. They are the perfect size for starting a fireplace fire. In the summer though, we don't use the fireplace but we do use the fire pit. Nothing says summer like a great big bonfire! 

make fire starters for camping

I decided I better come up with a larger sized fire starter for the bonfires. If i didn't come up with something, hubby was going to continue to do it his way and that is a bad idea! (I'll give you a hint....his way includes massive amounts of gasoline and a big "Whoosh" as it ignites! Not safe!!) 

I dug around and found a few ideas to make much larger fire starters. These ones still use old wax and this time I'm recycling egg cartons and empty toilet paper tubes. Just like the first fire starters, these ones are really easy, and cheap. I'll show you how!

Using recycled K-cups as seedling pots

Every year I start a good amount of my garden plants from seeds. Actually, I start just about everything but the annual flowers I put in the planters. I'm also frugal, so I often buy my seed starting supplies when they go on clearance in the fall.

kcups being used to grow seedlings

This past year I bought some 'mini greenhouse' kits with growing pellets for $.99 each. At that price I bought all 3 that they had! This is how I started my seeds this year.

I simply watered the pellets to make them expand, added seeds, put the lid on then filled out the diagram. I put the mini greenhouse in a sunny window and waited.

Everything was sprouting well and really filling in the growing pellets. I was starting to wonder where I'm going to move them next, when I remembered.....

Now bear with me a second here cause this is where we go back a few months. In January my husband showed me an article that mentioned how many hundreds of thousands of K-cups end up in landfills every year.

Great! Like I needed something else to feel guilty about...right?

recycled seed starting containers

So I started saving them with hopes of finding a way to recycle them. I peeled off the foil tops and shook the coffee grounds out to use in my garden and compost. I let the cups dry out, but didn't really know what to do with them.

In February though, Lisa from Fresh Eggs Daily wrote a post about using K-cup as seed starters. Great idea! Unfortunately I had already started my seeds at the time, but these would be perfect now for thinning them out!

I lined up the recycled K-cups in the same configuration as the growing pellets. I actually used the lid of the mini greenhouse since I wasn't using it anymore, and it worked perfectly!

I also wrote the name of the seedling on the outside of the cup in sharpie for good measure!

Next I added my soil mixture and watered them all so the soil would settle. I gently teased apart the soil in each pellet using a toothpick and transplanted 1-2 seedlings into each K-cup.

k-cups and peat pellets for seed starting
This is the before & after.

I filled in each cup with soil and watered again, being careful that the seedling didn't fall over and was well supported by the soil.

Then I moved them back to my sunny window and that's it! The K-cups should give them enough room that they can establish a strong root system for when I transplant them into the ground in a few weeks....plus I saved some plastic from the landfill!

Now granted, this only save a small fraction of K-cups from the landfill. Some is better than none though, right? I am looking for other ways to reuse K-cups though so if you have a great idea, please forward it to me so I can give it a try!

Thanks and happy healthy seedlings to all!

~L  

Want gardening and healthy living information sent right to your email weekly? Click right here to join my newsletter listand get new posts sent directly to you the day they're published!

Easy craft: Google eyed egg people

I'm bored! Seriously, the amount of snow we've had over the last 2 months has made me stir crazy and I can't wait for summer and gardening season to get here! So I've been working on my garden. Planning mostly, but I've started seeds for some of the smaller plants like herbs. Herbs are a great choice to start early because they do well in pots on the windowsill. Plus, herbs transplant into the garden easily once the soil warms up.

eggshell craft

I've been saving eggshells and using them to start seeds. They are perfect for herbs and look so much cuter on the windowsill then those plastic nursery starter pots. The lavender started sprouting and the way it was growing almost made the eggshell look like...well, an egghead! 

First I started laughing at it. Then I started thinking. Guess what happened next? I discovered a cute and simple Easter craft!

Keep boots dry with a pool noodle!

There is nothing worse then boots that feel damp inside! I really hate that. I have one pair that make my feet sweat like crazy. I have another pair that gets wet inside every time I wear them in the  rain. Yuck! I try not to wear them when it's wet out, but sometimes it doesn't work out that way. 

Tall dress boots with pool noodles in them to keep them standing up

When boots do get wet inside, it's important to allow them to dry thoroughly. Especially tall ones. Bacteria can thrive in moist dark areas like a pair of knee high boots. The best thing to do is to stand them up to dry them out.

How to recycle a broken bucket into a planter

A few months ago my ash bucket was smashed and I had the idea to turn it into a planter! I try to reuse things that still have some life in them and I can always find a place for another flower planter! I just had to get a few things together and also, find the culprit that smashed my bucket!

Like how does that even happen?

Don't you just hate when somebody breaks something, but doesn't tell you? Inevitably when I find out I end up blaming the most likely suspect....but I'm sometimes wrong. That is exactly what happened to my ash bucket!

Flower planter made from old bucket

The chilly weather snuck in out of nowhere and I decided I should light a fire in the bedroom fireplace to chase the chill away. The fireplace had some dust from being closed up all summer so I needed the ash bucket to clean the fireplace out. 


I called youngest son and ask him to bring me said bucket from the shed. He does, so I clean the fireplace out and light a fire. The room warms up and everything goes back to normal. This should be the end of the story, right? 

Except a few days later when I pick up the bucket to empty it, I notice bits of dust flaking out of the bucket. Upon further inspection I find something out pretty quickly. The ash bucket is broken. I'm talking caved in on one side crushed!

I'm talking crushed so hard that it had separated from the base in one spot! 

Why you need to grow mint in a planter

I love mint! Mint tea, mint flavorings, mint in lotions potions and brews oh my! Spearmint, peppermint, lemon mint, chocolate mint...I could go on and on. The best way to use mint is fresh, so of course I need to grow some every year. Luckily mint is a super easy to grow perennial and one plant can produce fresh mint for years!

How to grow mint

However, mint is a very invasive plant. It reproduces by sending out roots called runners just below the soil. First you'll notice small mint plants popping up close to the parent plant. Then you'll notice them farther and farther away until suddenly they're everywhere!

Since the mint plant is sending out runners in different directions, it seems to take over all at once. So one mint plant can quickly turn into a garden full! This is why you need to grow mint in a container. 

By keeping the roots neatly contained in a planter, you will prevent them from sending out those runners under the soil line. 

Pond makeover

We used to have 2 Sebastopol Geese. We bought them one of those preformed ponds to swim in, I believe it holds around 150 gallons. They absolutely loved it! Unfortunately we decided to sell the geese, since they loved playing in the yard and we couldn't let them out as much as we would like.

backyard fish pond project

So the goose house and the goose pond became the duck house and the duck pond. Then the ducks learned how to fly out and decided their favorite pastime was sitting by the patio door waiting for us to come out and pooping. YUCK! 

Between that and the fox problem we decided they would be better off (and safer) elsewhere and they were sold too.

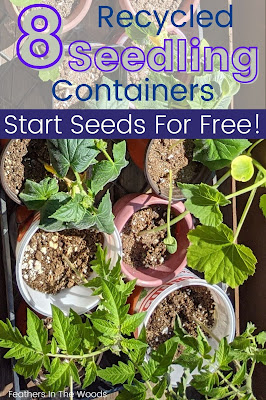
8 Recycled seed starter containers from single use plastic

It's almost time to put the seedlings in the garden, and if you're like me you started some of them weeks ago. I'm very frugal when it comes to a lot of things and seed starting is no different. Now, I know I'm not the first one to use old plastic containers to start seeds in. Not only is it a common idea, but it's so very practical. Especially with single use plastic!

Plastic seed staring containers with plants growing in them

Our lives are so full of plastic that designed to be used exactly once, that it just makes sense to reuse it in any way we can. Now I know my seed starting area is not perfectly lined up with same size plant cells and trays, but I save money and maybe help save the planet a little too. Win-win!

Besides, have you ever seen the prices on seed starting trays? They can go from $1 for a small 6 cell tray to up to $15 each for a larger one! That's just crazy if you ask me, especially since we throw away so many perfectly usable plastic containers all the time. 

So today I want to share with you a few of my favorite recycled seed starting containers.

The melted chapstick car mess fix

My husband uses Chapstick. I use Chapstick too, or lipgloss or lipstick but he hates my flavored ones. Even the awesome green apple Chapstick! He says "what posses a 41 year old woman to still use this stuff?" I think he means it as an insult, but I don't care. I like it. I mean c'mon, do I really have to act like a grownup in every single aspect of my life?

clean melted lipgloss from inside car

Anyway, he keeps a plain Chapstick in his car and another in my truck. Yesterday I got in the car and the picture above is what greeted me.

Make your own fire starters

I'm a little bit of a fire-bug. We have a huge fire pit outside with a big burn cage and a fireplace in the house. I'm forever burning something. There is only 1 thing I don't like to burn and that is fire-starters. Well, not really all fire starters....it's the boxed ones we buy in the store that I hate to use. I just don't get it.

fire starters made from old candles and cotton face pads

Why do I want to buy something just to burn it? I just see it as burning money! My husband loves the things and always tells me "just put a fire starter in there" as I struggle to light the fire, ripping up newspaper and cardboard to try and get things going. *sigh* It's a problem, really.

Truthfully, all that paper and cardboard isn't that good for the chimney. Apparently it burns at too low of a temperature and can contribute to buildup in the chimney. Those guys are expensive when they come out to clean the chimney! So it's best I burn as little paper as possible.

Make your own fire starters


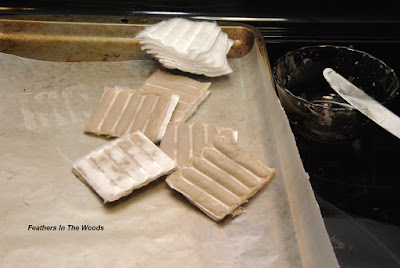
I think I have it figured out though. I made my own fire starters! I used dollar store cotton pads and the wax I was going to throw away from the wax burner. You know how you use wax melts and after awhile they stop smelling? That's the old wax I used for this project! 

I also added the scrapings from some container candles that were too low to burn anymore. I put that concoction in a glass baking cup, melted it, dipped the pads and voila! They don't smell fancy, but they get the job done.

make your own fire starters

I dressed the dogs

I have a very sane reason for why I dressed the dog (this time! lol) It was cold out. Single digits, bone numbing cold. Actually, one night the wind chill got down to -20. Oh, did I mention we're in Western Pennsylvania right at the bottom of the snow belt? We get a whole lot more snow then our friends down in Pittsburgh. Sometimes as much as a foot more! 

Add the snow to the cold and you have one worried mama. I bundle up the kids and the little dog, but what to do about my snow loving Boxer mix? Large breed dog coats are super expensive, and she really only needs it for a few days a year so I hate to spend too much. 

So, what to do? Youngest son was throwing out some size 7 long sleeved T-shirts so I figured I'd see if one fit on Lulu and guess what....it did! 

dog in snow wearing a t-shirt

I like the way the sleeves cover her legs without covering her feet. The shirt is snug without being tight, so it doesn't bunch up or get in her way...and I think she looks cute!

Lulu doesn't get dressed very often but Ashley is another story! I'm against spending huge amounts of $$ on dog clothes however, so my favorite shopping place lately (besides clearance sales at Petco) is 5 Below. I got Ashley this Snuggie brand dog coat for $5.

Small dog with coat on

I like the fact that it has wide Velcro tabs, it's so hard to hook those small ones. She doesn't seem to mind it and I put it on her a lot in winter so ease of use is super important! She shivers a lot when shes outside in the winter, so she needs a coat every time she goes outside. Plus, I think she secretly likes dressing up. lol

~L